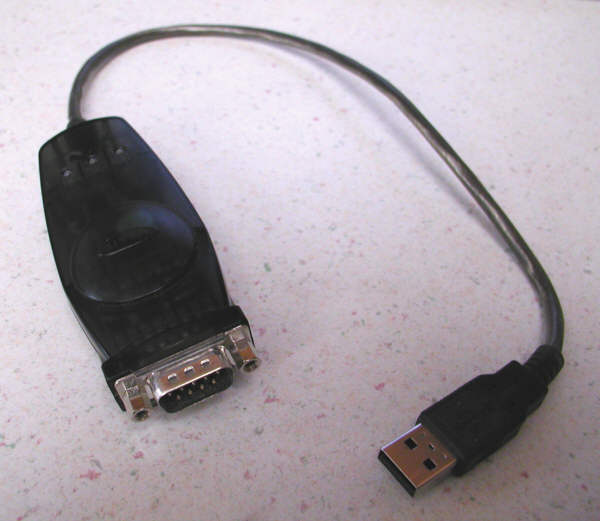
| A Belkin USB to Serial Converter: |
|---|
 |
Last update - 6/25/2018
Some of the newer laptops of the past few years no longer have traditional RS232 serial ports, however the CROPSCAN MSR System can still be operated or connected to these laptops by use of a USB-to-Serial converter. Various brands of USB-to-Serial converters are available at most computer stores or from numerous computer related websites by mail order.
NOTE: Be sure to install the appropriate USB-to-Serial driver for the Windows operating system on your PC. You may need to visit the USB-to-Serial manufacturer's webpage for the latest windows drivers. Some of the older USB-to-Serial adapters are not compatible with the newer versions of Windows and you may need to get a newer USB-to-Serial adapter.
| A Belkin USB to Serial Converter: |
|---|
 |
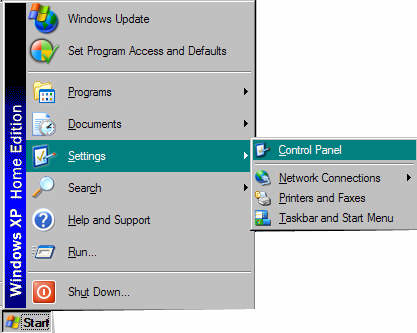
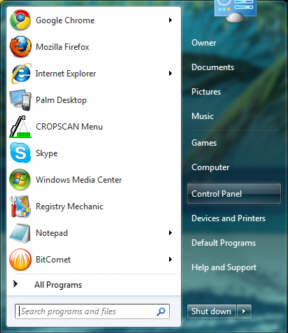
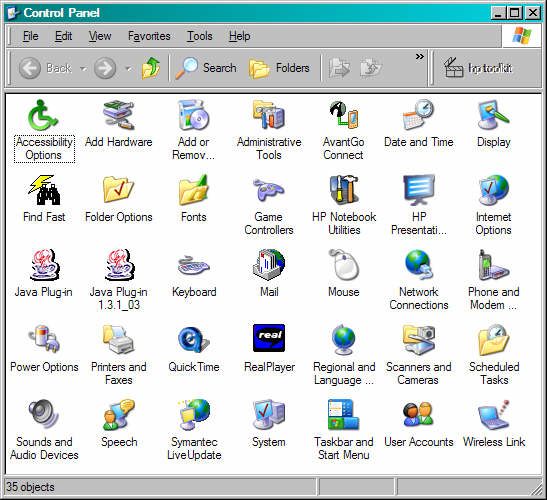
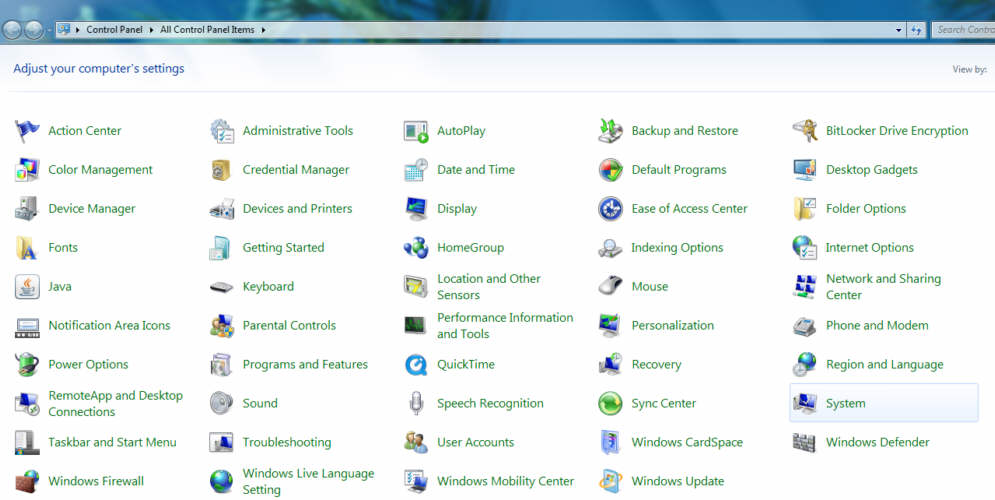
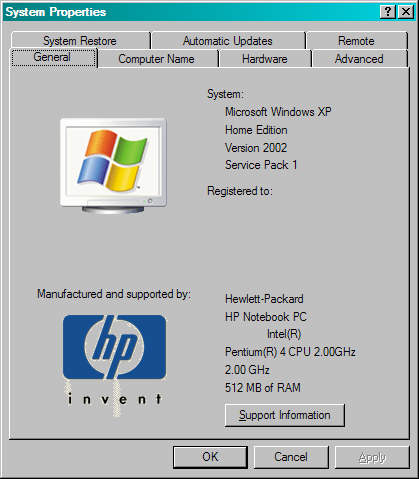
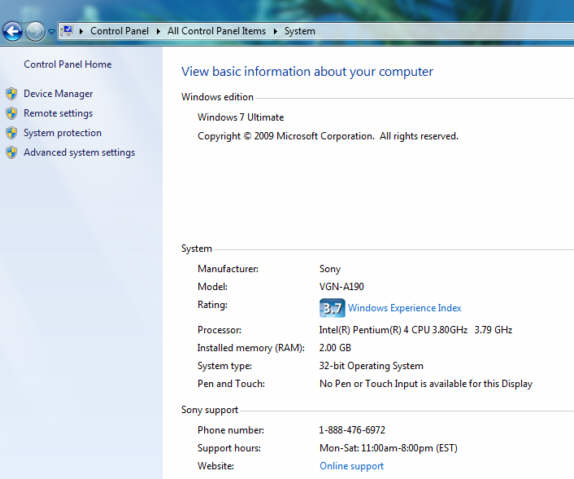
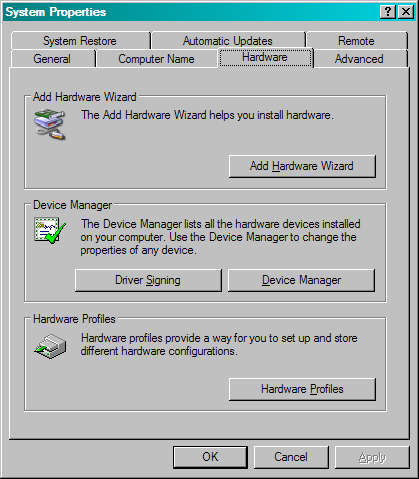
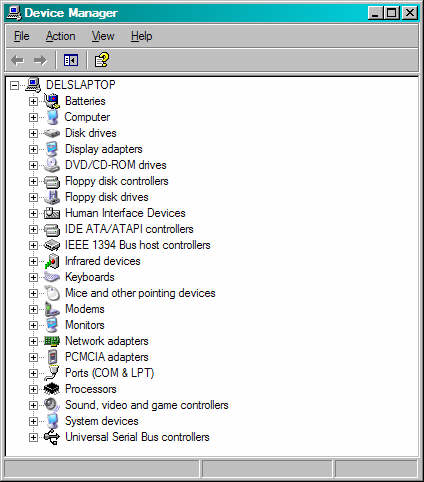
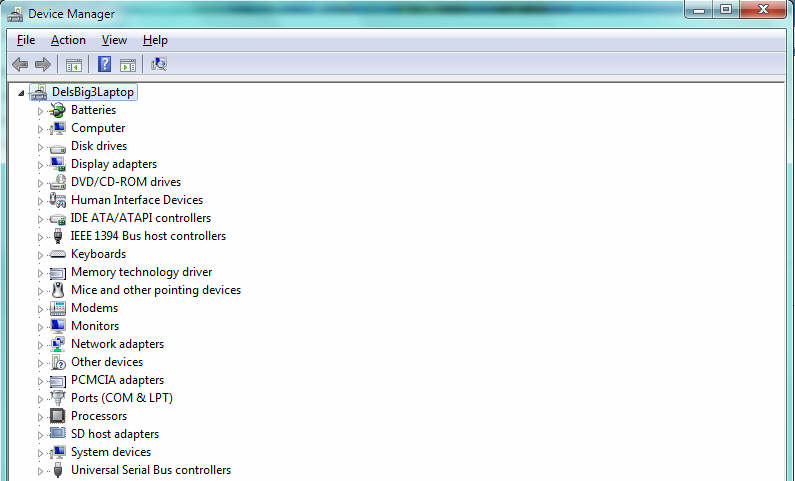
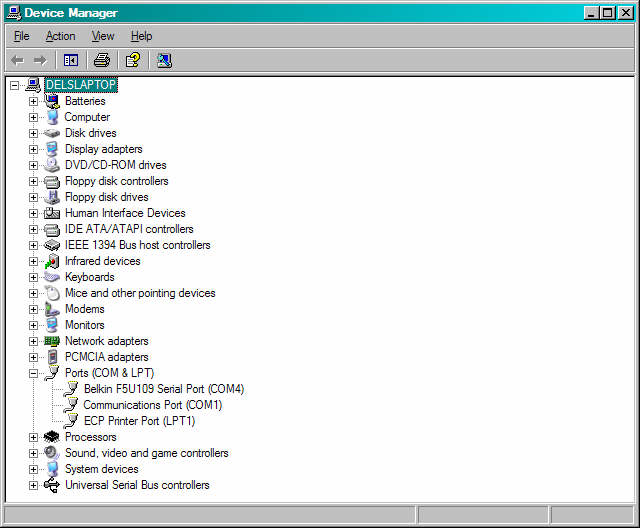
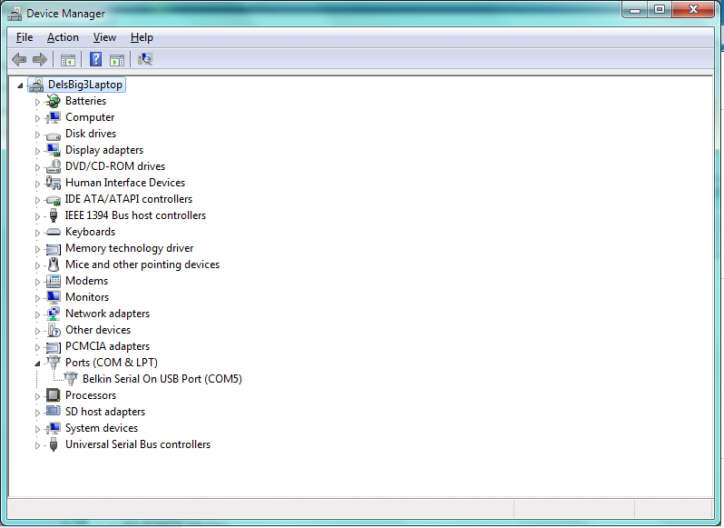
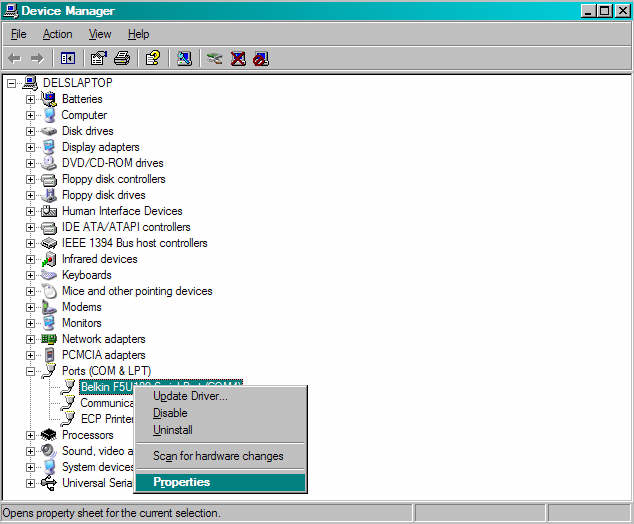
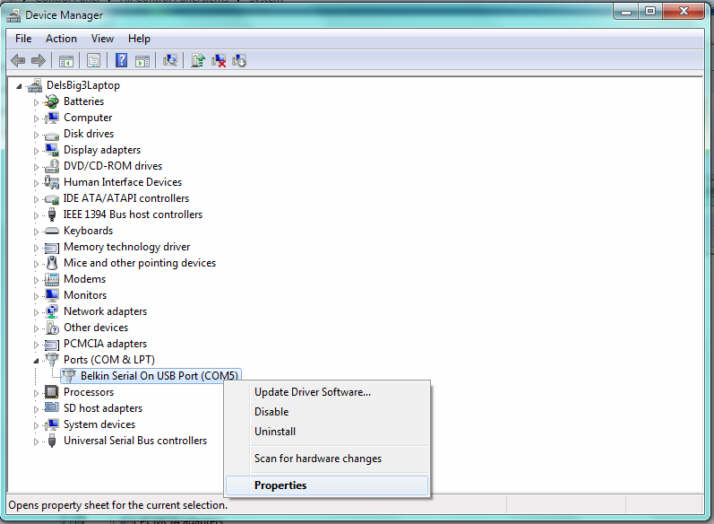
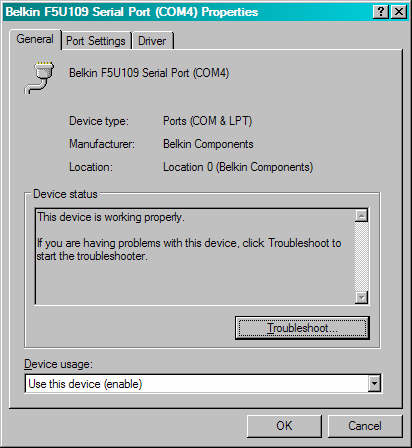
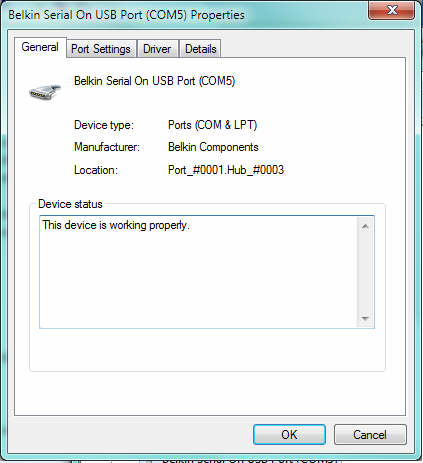
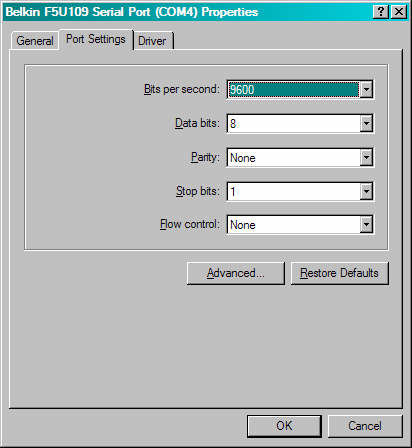
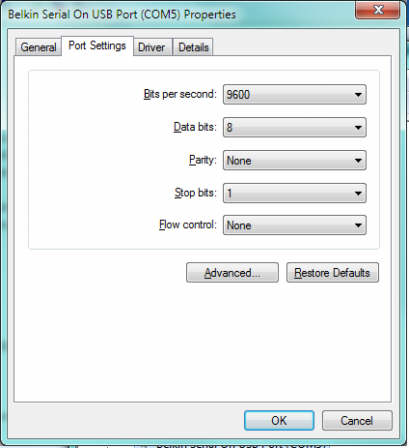
To determine the COM port number of the USB to Serial Converter, do the following:
| WinXP | Win7 |
|---|---|
 |  |
| WinXP | Win7 |
|---|---|
 |  |
| WinXP | Win7 |
|---|---|
 |  |
| WinXP |
|---|
 |
| WinXP | Win7 |
|---|---|
 |  |
| WinXP | Win7 |
|---|---|
 |  |
| WinXP | Win7 |
|---|---|
 |  |
| WinXP | Win7 |
|---|---|
 |  |
| WinXP | Win7 |
|---|---|
 |  |
| WinXP | Win7 |
|---|---|
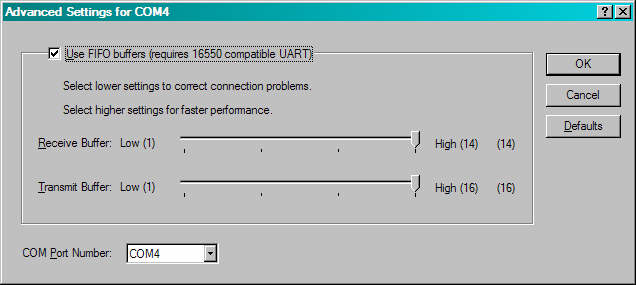 | 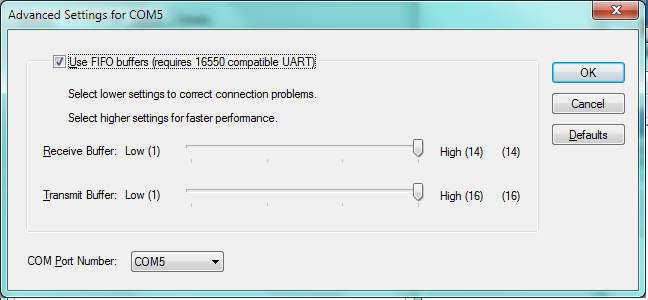 |
Enter the COM port number, found above, at the COM port prompt in the CROPSCAN MSR Software (TERMINAL, RETRIEVE, etc.).
Note: If that same COM port is used for other devices (GPS, PocketPC or PDA synchronizing) be sure to end those programs or configure them not to be using the COM port when using the COM port with the MSR System software, otherwise erratic behavior can result.
 CROPSCAN, Inc. Home Page
©2004-2018 CROPSCAN, Inc.
all rights reserved